Monday, November 29, 2010

Garage Storage Cabinets

My mom has cooked and collected in her kitchen for over 25 years now without an official pantry. As a result, the island cabinets have become the main storage place for canned goods; the lower perimeter cabinets are organized only in that the metal pans are stacked in one area; the glass cooking ware is stacked in another couple of cabinets; cooking ingredients are in another tall cabinet - along with 4-seasons-worth of place mats. In general everything has its place, but without prior knowledge, a stranger couldn't find an oven pan (on the opposite side of the kitchen from the oven at the bottom of a stack of metal pans in the lower cabinet).

So I was asked to build a pantry in the garage, which had already become the room where old crock pots and ice cream makers went dormant for 364 days out of the year. So we decided on some massive cabinets that would be more functional than aesthetic.


I built them to be the same height as the adjacent kitchen door - 79 1/2 inches. The 4 carcasses measure 8 feet across with the outer two being a few inches wider than the inner 2. The left carcass is the new pantry for canned goods and other non-perishables. The inner 2 doors hold the majority of pans, place mats, pots, etc... which aren't commonly used. The far right carcass is for cleaning supplies - brooms, vacuums, rakes, etc... The roof of the cabinet makes a handy place for paper goods.


Building the pantry was a fun test of functional design. I recessed the top shelves because they were too high up for one to reach up, bend his elbow 90 degrees, and actually get to the back of the shelf. By recessing it several inches, the user can reach up at an angle and get to the rear of the cabinet. It also serves to let the flood light shine through to the lower shelves.

Similarly, I built the shelf for canned goods in a U-shape so that my mom could still reach down to the rear of the one below it. The cabinets are almost 2' deep, so to bend down to the lower shelf and actually get to the back of a 2' shelf would be uncomfortable. For the canned goods shelf, I glued the front lip slightly above the adjoining shelf to create a small ridge along the perimeter so that the cans could be packed without fear of them sliding off. All of the other lips are flush with the shelves.

The major challenge with this project was that we skimped on the lumber and ended up getting some very warped discounted wood. I thought this would be okay since I was building it into the wall and could straighten it up by tacking it to the existing studs - I was wrong. This made the doors especially challenging.

In the end, we made a sturdy and functional storage space for those must-have kitchen appliances that only get used once a year and don't deserve being stacked with those pans that are used weekly. Not to mention - the annoyance with getting to a pan that is at the bottom of a precarious tower of tin. Now that tower is much smaller. Somehow, even with a new large-volume storage area, we will still manage to run out of space for various doohickeys.

Tuesday, October 19, 2010

Teak Shower Stool

My first commissioned project was to build a shower stool for a friend of mine. His girlfriend had the complaint that she had no where to prop her legs while shaving, and he often wished he could sit in the shower after a long run.

I built this stool from a piece of teak that I bought at Suwanee Lumber just north of Atlanta. The board was only 3/4" thick, so I had to laminate the legs using biscuits and waterproof glue.

I made a couple of mistakes in this project.

Most importantly, I cut the legs the wrong way - the grain runs horizontally as opposed to vertically, which would be ideal for supports that take 99% of their load in that direction...oops. I think the stool will be okay because it is laminated so it can't break all the way through along a pre-existing fissure.

The second mistake I made was not using acetone. I saw on "The New Yankee Workshop" that Norm used acetone before gluing teak together. He said that the natural occurring oil that makes teak ideal for humid environments, also makes it difficult for the glue to adhere. He said that whipping the wood with acetone before gluing would take care of that problem.

Maple Mantle


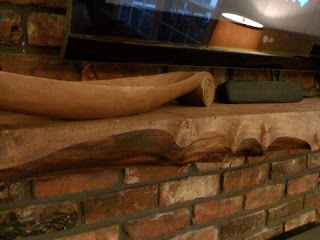
This mantle required very little fabrication. We bought three large chunks of maple and finished them - that was the extent of the woodwork. The difficulty was in mounting the pieces to create one long mantle to span the entire wall.


We had to bump out the middle section because of the chimney. We installed wooden dowels into the walls, and metal ones into the mortar in the chimney. Keeping the mantle level was also a challenge. It took 4 of us to lift the pieces and align the dowels in the wood before the glue dried.

Saturday, July 31, 2010

Bookcase


My latest project was this bookcase that I built for my girlfriend, who will need space for her large med school text books (currently, Harry Potter dominates the top shelf). I made it using notes from one of Norm Abram's New Yankee Workshop books. His bookcase is only about 77" tall, so I modified it to add an extra shelf. My 90"-tall book case can handle 7 shelves with 12" spacing. The case is also 11 3/4" deep, so it can handle large text books, as well as a TV. Right now, there are only 6 shelves, but I made a 7th, which can be slid in to separate the 24" gap where the TV now sits.

The bookcase is made primarily from birch-faced plywood, which I stained with mahogany and then varnished with a semi-gloss finisher. The birch plywood was easy to work with. I bought a full 4' x 8' sheet for $48, and had it ripped in the store to make the sides, the top and bottom, and 2 shelves. I had to buy another half sheet to make the remaining shelves. The back is 1/4" birch-faced plywood. I used select pine to cover the sides of the birch-faced wood so that none of the plywood is exposed. There are 2" stiles that run up the sides of the case, and 1 1/2" lips to cover the front of the shelves. The baseboard is 5"-wide select pine that I ripped from a 1"x6" and then ran a decorative bead around the top using a 1/4" round-over bit in my router. For me, the hardest part was the crown molding that decorates the top. The New Yankee Workshop is full of neat tools that I don't have. I use a radial saw without a miter gauge. Therefore, cutting a compound miter with the miter gauge set to 45 degrees and the saw tilt set to 38 degrees was very difficult for me. Not to mention, my saw probably needs realignment. I was able to use crown molding scraps to finally find the correct position to set the saw for the molding to turn the corner at the top of the shelf.

Sunday, July 18, 2010

PM Cookout Cart


I built this cookout cart from a recent DIY page in Popular Mechanics magazine. The specs have been added to their website:

Popular Mechanics Cookout Cart

This was a great DIY project that I would highly recommend to the novice woodworker (with added benefits if you enjoy grilling).


A detailed breakdown can be found on the cookout cart page.

Intro to Wood Work Mann Blog

Hello all - I have recently developed a joy of woodworking, and am eager to create a site for fellow woodworking bloggers to:

- Learn / Teach the skills involved with woodworking
- Follow my personal creations through captioned pictures
- Share their personal creations
- Respond with constructive criticism for the purpose of personal improvement

I've always enjoyed construction, but have only recently begun to build individual pieces. This may be an opportunity for others to improve along with me - or for experts to share their knowledge of woodworking with a younger generation of IKEA-driven furniture buyers.