My mom has cooked and collected in her kitchen for over 25 years now without an official pantry. As a result, the island cabinets have become the main storage place for canned goods; the lower perimeter cabinets are organized only in that the metal pans are stacked in one area; the glass cooking ware is stacked in another couple of cabinets; cooking ingredients are in another tall cabinet - along with 4-seasons-worth of place mats. In general everything has its place, but without prior knowledge, a stranger couldn't find an oven pan (on the opposite side of the kitchen from the oven at the bottom of a stack of metal pans in the lower cabinet).
So I was asked to build a pantry in the garage, which had already become the room where old crock pots and ice cream makers went dormant for 364 days out of the year. So we decided on some massive cabinets that would be more functional than aesthetic.

I built them to be the same height as the adjacent kitchen door - 79 1/2 inches. The 4 carcasses measure 8 feet across with the outer two being a few inches wider than the inner 2. The left carcass is the new pantry for canned goods and other non-perishables. The inner 2 doors hold the majority of pans, place mats, pots, etc... which aren't commonly used. The far right carcass is for cleaning supplies - brooms, vacuums, rakes, etc... The roof of the cabinet makes a handy place for paper goods.

Building the pantry was a fun test of functional design. I recessed the top shelves because they were too high up for one to reach up, bend his elbow 90 degrees, and actually get to the back of the shelf. By recessing it several inches, the user can reach up at an angle and get to the rear of the cabinet. It also serves to let the flood light shine through to the lower shelves.
Similarly, I built the shelf for canned goods in a U-shape so that my mom could still reach down to the rear of the one below it. The cabinets are almost 2' deep, so to bend down to the lower shelf and actually get to the back of a 2' shelf would be uncomfortable. For the
canned goods shelf, I glued the front lip slightly above the adjoining shelf to create a small ridge along the perimeter so that the cans could be packed without fear of them sliding off. All of the other lips are flush with the shelves.
The major challenge with this project was that we skimped on the lumber and ended up getting some very warped discounted wood. I thought this would be okay since I was building it into the wall and could straighten it up by tacking it to the existing studs - I was wrong. This made the doors especially challenging.
In the end, we made a sturdy and functional storage space for those must-have kitchen appliances that only get used once a year and don't deserve being stacked with those pans that are used weekly. Not to mention - the annoyance with getting to a pan that is at the bottom of a precarious tower of tin. Now that tower is much smaller. Somehow, even with a new large-volume storage area, we will still manage to run out of space for various doohickeys.

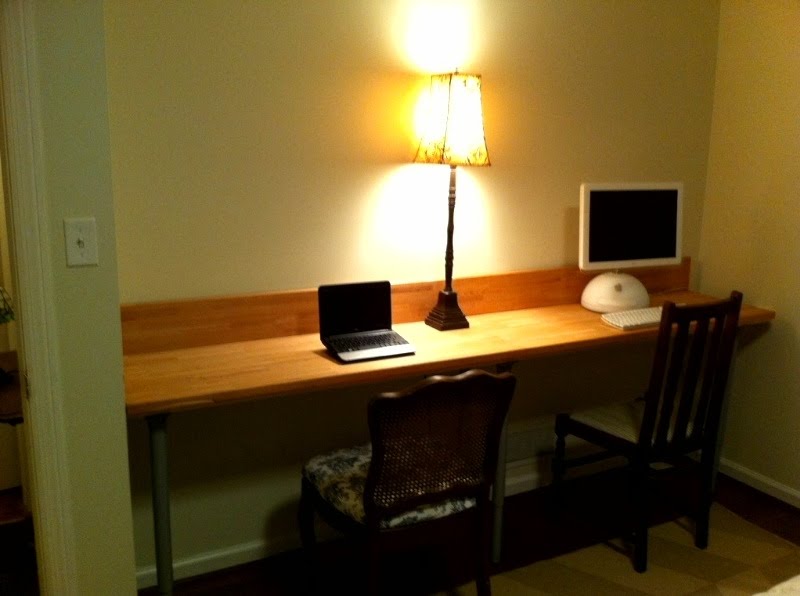 This one was pretty easy. My sister had the idea of taking two relatively cheap butcher block tops from IKEA and creating a desk out of them. I ripped the two tops to the appropriate width for the space and used smaller cutoff as a backsplash. My sister supported the desk with store-bought metal legs and a 2" x 4" cleat in the wall.

 My first commissioned project was to build a shower stool for a friend of mine. His girlfriend had the complaint that she had no where to prop her legs while shaving, and he often wished he could sit in the shower after a long run.
 ge. It took 4 of us to lift the pieces and align the dowels in the wood before the glue dried.


